ZheJiang VOB Technology CO.,LTD.
  • Home
  • Products
    • Brake Chamber
    • Manual Slack Adjuster
    • Auto Slack Adjuster
    • Air Suzie
    • Palm Coupling
    • Hydraulic Hose
    • Swift Joint
    • Quick Release Valve
    • Unloader Valve
    • Air Dryer
    • Relay Valve
    • Foot Brake Valve
    • Circuit Protection Valve
    • Hand Brake Valve
    • Clutch Booster
    • Levelling Valve
    • Gear Box Valve
    • ELC Valve
    • Switch Part
    • Cylinder
    • Fuel Pump
    • ABS Ecas
    • Clutch Cylinder
    • Tensioner
    • Cabin Pump
    • Brake Shoe Kit
    • Tire Screw
    • Union
    • HUB Cover
    • Cabin Lock
    • “U” Lock
    • Brake Chamber
    • Manual Slack Adjuster
    • Auto Slack Adjuster
    • Air Suzie
    • Palm Coupling
    • Hydraulic Hose
    • Swift Joint
    • Quick Release Valve
    • Unloader Valve
    • Air Dryer
    • Relay Valve
    • Foot Brake Valve
    • Circuit Protection Valve
    • Hand Brake Valve
    • Clutch Booster
    • Levelling Valve
    • Gear Box Valve
    • ELC Valve
    • Switch Part
    • Cylinder
    • Fuel Pump
    • ABS Ecas
    • Clutch Cylinder
    • Tensioner
    • Cabin Pump
    • Brake Shoe Kit
    • Tire Screw
    • Union
    • HUB Cover
    • Cabin Lock
    • “U” Lock
  • About Us
  • News
  • Contact Us
  • ES
  • EN
  • RU
  • SA

Web Menu

  • Home
  • Products
    • Brake Chamber
    • Manual Slack Adjuster
    • Auto Slack Adjuster
    • Air Suzie
    • Palm Coupling
    • Hydraulic Hose
    • Swift Joint
    • Quick Release Valve
    • Unloader Valve
    • Air Dryer
    • Relay Valve
    • Foot Brake Valve
    • Circuit Protection Valve
    • Hand Brake Valve
    • Clutch Booster
    • Levelling Valve
    • Gear Box Valve
    • ELC Valve
    • Switch Part
    • Cylinder
    • Fuel Pump
    • ABS Ecas
    • Clutch Cylinder
    • Tensioner
    • Cabin Pump
    • Brake Shoe Kit
    • Tire Screw
    • Union
    • HUB Cover
    • Cabin Lock
    • “U” Lock
    • Brake Chamber
    • Manual Slack Adjuster
    • Auto Slack Adjuster
    • Air Suzie
    • Palm Coupling
    • Hydraulic Hose
    • Swift Joint
    • Quick Release Valve
    • Unloader Valve
    • Air Dryer
    • Relay Valve
    • Foot Brake Valve
    • Circuit Protection Valve
    • Hand Brake Valve
    • Clutch Booster
    • Levelling Valve
    • Gear Box Valve
    • ELC Valve
    • Switch Part
    • Cylinder
    • Fuel Pump
    • ABS Ecas
    • Clutch Cylinder
    • Tensioner
    • Cabin Pump
    • Brake Shoe Kit
    • Tire Screw
    • Union
    • HUB Cover
    • Cabin Lock
    • “U” Lock
  • About Us
  • News
  • Contact Us

Product Search

Language

  • English
  • España
  • русский
  • عربى

Share

Exit Menu

News
Home / News / Semi Brake Adjustment Tool: Applications, Selection Criteria, and Practical Guidance
News

Products

  • Brake Chamber
  • Manual Slack Adjuster
  • Auto Slack Adjuster
  • Air Suzie
  • Palm Coupling
  • Hydraulic Hose
  • Swift Joint
  • Quick Release Valve
  • Unloader Valve
  • Air Dryer
  • Relay Valve
  • Foot Brake Valve

Semi Brake Adjustment Tool: Applications, Selection Criteria, and Practical Guidance

Update:16-11-2026
Summary: A semi brake adjustment tool is the small kit used to measure how far a brake chamber push rod extends and to bring tha...

A semi brake adjustment tool is the small kit used to measure how far a brake chamber push rod extends and to bring that travel back inside the legal limit by turning the slack adjuster. The one item you cannot improvise is a push rod stroke gauge; the rest is ordinary shop equipment — wrenches, chalk, a pry bar and a way to hold 90–100 psi in the system while you test.

Here is the conclusion first: measure before you touch anything, adjust second, and never turn an automatic slack adjuster simply to shorten a long stroke. If the applied stroke is outside the limit, the gauge tells you how far out you are and the chamber stamping tells you where the limit sits. A stroke that keeps growing after two adjustments is a wear symptom, not a tool problem — usually worn linings, a stretched or cracked drum, a leaking chamber, or worn S-cam bushings.

Content

  • 1 What Is Included in a Semi Brake Adjustment Tool Set?
    • 1.1 Stroke gauge
    • 1.2 Adjusting wrench
    • 1.3 Marking tools
    • 1.4 Pressure and support
  • 2 Push Rod Stroke Limits You Should Be Checking Against
  • 3 How to Use the Adjustment Tool, Step by Step
    • 3.1 Which Way Do You Turn a Manual Slack Adjuster?
  • 4 Manual vs Automatic Slack Adjusters: Same Gauge, Different Rules
  • 5 Common Mistakes That Make Stroke Worse
  • 6 Buying Checklist: What Separates a Good Gauge from a Cheap One
  • 7 Where the Tool Meets the Hardware
  • 8 FAQ
    • 8.1 Can a driver adjust semi brakes with a stroke gauge?
    • 8.2 What size wrench fits a slack adjuster?
    • 8.3 How often should push rod stroke be checked?
    • 8.4 Why does the stroke keep growing after adjustment?
    • 8.5 Is a magnetic stroke gauge better than a clamp type?

What Is Included in a Semi Brake Adjustment Tool Set?

A complete set covers four separate jobs: measure, hold, turn and verify — and a kit that only does one of them will send you back to the toolbox mid-inspection.

Stroke gauge

A clamp-on or magnetic gauge that sits on the push rod and reads travel in both inches and millimetres. This is the measuring instrument; nothing else gives a repeatable number.

Adjusting wrench

A ratchet-type slack adjuster wrench or a short combination wrench that fits the adjusting hex, sized to the adjusters on your fleet.

Marking tools

Chalk or a paint pen to mark the rod at the released position, plus a steel rule or caliper as a cross-check on the gauge.

Pressure and support

Wheel chocks, a brake pedal depressor, gloves and a flashlight. The test is only valid at the specified reservoir pressure with the spring brakes released.

Hand tool sizes worth having in the same bag:

  • 7/16 in and 5/8 in for the common adjusting hex sizes, with 9/16 in and 1/2 in square drive for older or heavier adjusters.
  • 9/16 in and 3/4 in for clevis clamp bolts and chamber mounting nuts.
  • A short pry bar to check clevis pin play and to hold the adjuster steady while you turn the hex.
  • An air chuck and gauge if the dash gauge is not readable from the pit.

Push Rod Stroke Limits You Should Be Checking Against

The limit belongs to the chamber, not to a wall chart — every chamber carries a stamping or data plate giving its rated stroke, and the inspection limit sits below that figure.

Typical applied-stroke limits by chamber type. The stamping on the chamber and the OEM service data always take priority over this summary, and long-stroke chambers in particular must be identified before any adjustment.
Chamber type Rated stroke Typical readjust limit Where it usually sits
Type 9 / 12 1-3/4 in (44 mm) 1-1/4 to 1-3/8 in (32–35 mm) Light steer axles
Type 16 2 in (51 mm) 1-3/4 in (44 mm) Steer and light drive axles
Type 20 / 24 2 in (51 mm) 1-3/4 to 2 in (44–51 mm) Drive and trailer axles
Type 30, standard stroke 2 in (51 mm) 2 in (51 mm) Drive axles, heavy trailers
Type 30/30, long stroke 2-1/2 to 3 in (64–76 mm) 2 in (51 mm) Trailers, high-load axles

How to Use the Adjustment Tool, Step by Step

The sequence never changes: secure the vehicle, charge the system, mark the rod, apply the brake, measure, compare, then adjust and re-measure.

  1. Chock the wheels and release the spring brakes so the push rods are fully retracted.
  2. Build reservoir pressure to 90–100 psi (roughly 620–690 kPa) and shut the engine down.
  3. Mark the push rod flush with the chamber face using chalk — this is your zero point.
  4. Have a helper make a full brake application and hold it, or use a pedal depressor.
  5. Clip the stroke gauge at the chamber face and read the distance from the mark. Note it in millimetres; the stamped limit is often given in inches.
  6. Release the brake, then compare the reading with the chamber specification. Inside the limit means the brake is set — record the number and move on.
  7. Adjust only if you are outside the limit and the adjuster is a manual type.
  8. Repeat the measurement at the same pressure after adjustment. Two consecutive adjustments that do not hold the stroke mean you stop and inspect hardware.

Which Way Do You Turn a Manual Slack Adjuster?

Turn the adjusting hex in the direction that shortens the stroke — normally clockwise on the common right-hand thread — until the linings contact the drum, then back off until the push rod just returns to its released position. Over-tightening is the most expensive mistake in this job: a brake that drags will overheat a drum within a few hundred kilometres, glaze the lining and crack the drum face. After backing off, always confirm with the gauge rather than with feel.

Manual vs Automatic Slack Adjusters: Same Gauge, Different Rules

You measure both types with the same tool, but you only adjust one of them by hand — the other is a component you diagnose, not a setting you tune.

  • Manual adjusters hold their setting with a locking collar or pawl. They are serviceable, and the stroke you set is the stroke you get until something wears.
  • Automatic adjusters reset themselves during normal apply-and-release cycles. Hand adjustment is reserved for installation and after a brake repair, following the maker's procedure — and the tool used for that is the same adjusting hex, not a different device.
  • A long stroke on an automatic adjuster points upstream: worn lining, a cracked or bell-mouthed drum, a leaking chamber diaphragm, a wrong installation angle, or a failed internal clutch.
  • Replacing an automatic adjuster to "fix" stroke without correcting the cause repeats the failure at the next service interval.

The practical consequence for a shop buying tools: a stroke gauge earns its place on every axle, while a heavy adjusting wrench is mostly a manual-adjuster item and a repair-time accessory.

Common Mistakes That Make Stroke Worse

Most bad adjustments come from skipping a step, not from a bad tool — the gauge is usually right and the reading is usually taken at the wrong moment.

  • Measuring with the spring brakes applied or with the system below the specified pressure, which understates travel.
  • Reading the released position instead of the applied stroke.
  • Tightening the adjuster until the shoes lock and leaving it there, producing drag and heat.
  • Turning an automatic adjuster by hand instead of finding the worn part.
  • Adjusting a chamber whose clamp band is corroded through or whose push rod is bent — geometry problems do not adjust out.
  • Never re-measuring, so the paperwork says one number and the axle holds another.

Buying Checklist: What Separates a Good Gauge from a Cheap One

For a fleet, repeatability matters more than absolute precision — a gauge that reads the same way twice is worth more than one with a finer scale and a slipping spring.

  • Dual scale, engraved. Printed millimetre markings wear off in a pit environment within a season.
  • Correct jaw opening. It should grip 5/8 to 7/8 in push rod diameters without cocking sideways.
  • Long-stroke coverage. A gauge that stops at 2 in cannot verify a long-stroke chamber.
  • Repeatability of roughly ±1 mm. Check a new gauge against a caliper on a known rod before trusting it.
  • Replaceable springs and jaws. The spring is the part that fails, and consumable support decides the tool's real cost per year.
  • Kit completeness. A shop with several bays should buy two gauges — dropped gauges and borrowed gauges are the same problem.
  • Cross-reference data. If you stock chambers for mixed fleets, ask the supplier for stroke limit data per chamber model so the gauge reading maps to a decision.

Where the Tool Meets the Hardware

A gauge only produces a number; the decision that follows the number is usually a parts decision, and the three components below cover most of them.

The slack adjuster itself wears at the spline and at the clevis pin bore. A manual unit that will not hold a setting, or whose locking collar slips under load, is finished regardless of how carefully you turn the hex. A matched manual slack adjuster with a clean spline and a free-turning pawl takes the adjustment and keeps it.
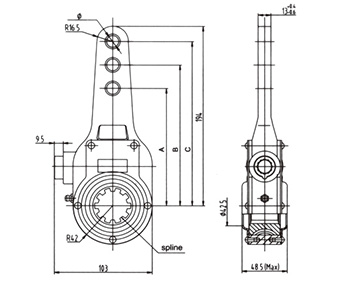
Manual Slack Adjuster for Truck Brake SystemsManual Slack Adjuster for Truck Brake SystemsManual slack adjuster for truck brake systems, relevant when a worn unit will not hold its setting and a matched replacement is needed.View Product →

On automatic units, the same logic applies from the other direction: if the internal clutch has stopped ratcheting, no amount of measuring will fix the stroke. Fit a replacement that matches the chamber stroke and the installation angle, then verify with the gauge on the first road test.
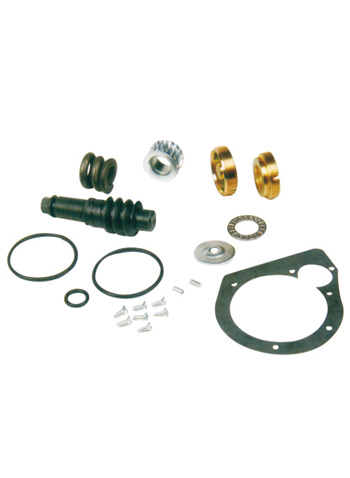
Type 1 Automatic Slack Adjuster Repair KitType 1 Automatic Slack Adjuster Repair KitType 1 automatic slack adjuster repair kit for commercial vehicle brakes, relevant when the internal clutch stops ratcheting and stroke must be restored.View Product →

And when the stroke grows because the chamber is tired — a weeping diaphragm, a corroded clamp band, a rod that no longer returns square — the chamber is the part that decides the measurement. Our commercial vehicle brake system range covers chambers, adjusters, shoe kits and the valves that feed them, so a single stroke reading can be traced back to the component that caused it.
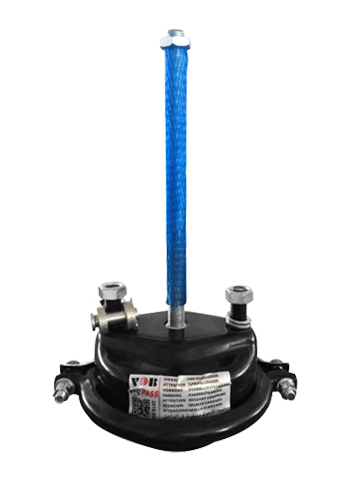
T24 Brake Chamber for Buses and TrailersT24 Brake Chamber for Buses and TrailersT24 brake chamber with 64 mm stroke and three variant options, relevant when stroke readings point to chamber condition rather than adjustment.View Product →

FAQ

Can a driver adjust semi brakes with a stroke gauge?

Measuring is always acceptable and is part of a proper pre-trip routine; adjusting is a maintenance task with legal consequences, and it is restricted on automatic slack adjusters except during installation or after brake repair. When in doubt, measure, record and hand the number to the shop.

What size wrench fits a slack adjuster?

Most manual adjusters use a 7/16 in or 5/8 in hex, with 9/16 in and 1/2 in square appearing on older or heavier units. A ratchet-style adjuster wrench with the right hex is faster in the pit than an open-end wrench.

How often should push rod stroke be checked?

Measure at every preventive maintenance interval, after any brake work, and whenever a driver reports a soft pedal or uneven stopping. Daily checks are visual — looking for a rod that hangs out further than its neighbours.

Why does the stroke keep growing after adjustment?

Because the adjustment is compensating for wear elsewhere: lining thickness, drum diameter, S-cam bushings, chamber push rod free play, or a stretched clevis. Two adjustments that do not hold are the signal to strip and inspect rather than adjust again.

Is a magnetic stroke gauge better than a clamp type?

Neither is universally better. Magnetic types are quicker on a clean rod; clamp types hold position on a corroded or painted rod. Buy the one that matches the condition of the rods you actually work on, and keep a caliper as a cross-check.


PREV:No previous articleNEXT:Truck Parts Names With Diagram: A Practical Guide to Four Vehicle Zones
  • product
    Brake Chamber
    Manual Slack Adjuster
    Auto Slack Adjuster
    Air Suzie
    Palm Coupling
    Hydraulic Hose
    Swift Joint
    Quick Release Valve
    Unloader Valve
    Air Dryer
    Relay Valve
    Foot Brake Valve
  • Links
    About Us
    Products
    News
    Contact Us
  • about
    Company Profile
    Factory
    Honor
    Brake Boosters

Wechat

Service Hotline

0086
13429565943

Working day 9: 00-18: 00

Contact Us

© ZheJiang VOB Technology CO.,LTD. All Rights Reserved.

Technical support: Smart cloud

Wholesale Spring Brake Chamber Manufacturers  China Spring Brake Chamber Factory